
Update (June 25, 2020): The button field is now available for all users — read more in our launch blog post: https://blog.airtable.com/now-available-button-field
Hello!
We recently announced the public beta of the button field (New beta: button field), a new field type that allows you to trigger customizable actions with a button. It allows you to perform actions in several blocks, including “Send email with Sendgrid” and “Run script”. These actions use the record that the button was clicked from to perform the specified action.
We’re excited to announce that you can also use the button field to perform actions in custom blocks.
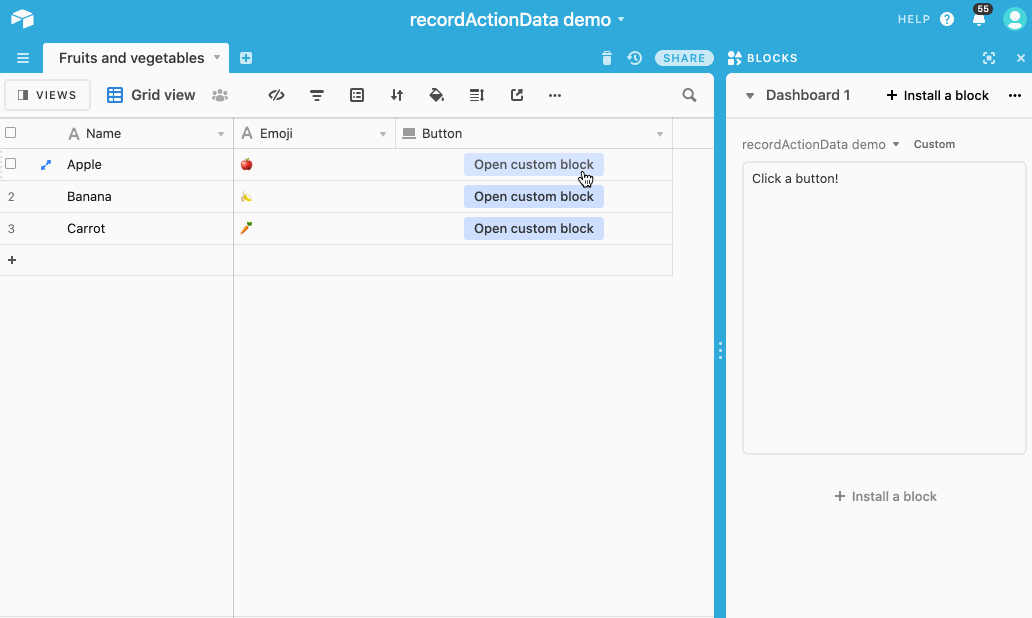
Here it is in action (source code below):
New APIs
Two APIs are available:
Both register your block to receive these “record action” events (button click) and give you the data corresponding to the record that the button was clicked from. See the API references for more details and examples.
The new APIs are available in SDK version 0.0.52. To upgrade to the latest version of the SDK, run npm install @airtable/blocks in your block’s directory. You can find the complete list of changes, including any breaking changes, in the changelog.
Example block code
import {Box, initializeBlock, useRecordActionData, useBase, useRecordById} from '@airtable/blocks/ui';


import React from 'react';


function RecordActionDataDemoBlock() {


    // null if no buttons have been clicked, otherwise {recordId, viewId, tableId} corresponding


    // to the last click


    const recordActionData = useRecordActionData();


    if (recordActionData === null) {


        return <Box padding={2}>Click a button!</Box>


    }


    return <RecordActionData data={recordActionData} />;


}


function RecordActionData({data}) {


    const base = useBase();


    const table = base.getTableByIdIfExists(data.tableId);


    const view = table && table.getViewByIdIfExists(data.viewId);


    const record = useRecordById(view, data.recordId);


    if (!(table && view && record)) {


        return <Box padding={2}>Table, view or record was deleted.</Box>


    }


    return <Box padding={2}>


        <ul>


            <li>Table: {table.name}</li>


            <li>View: {view.name}</li>


            <li>Record: {record.name}</li>


        </ul>


    </Box>


}


initializeBlock(() => <RecordActionDataDemoBlock />);
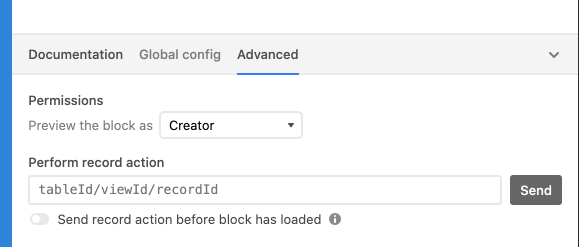
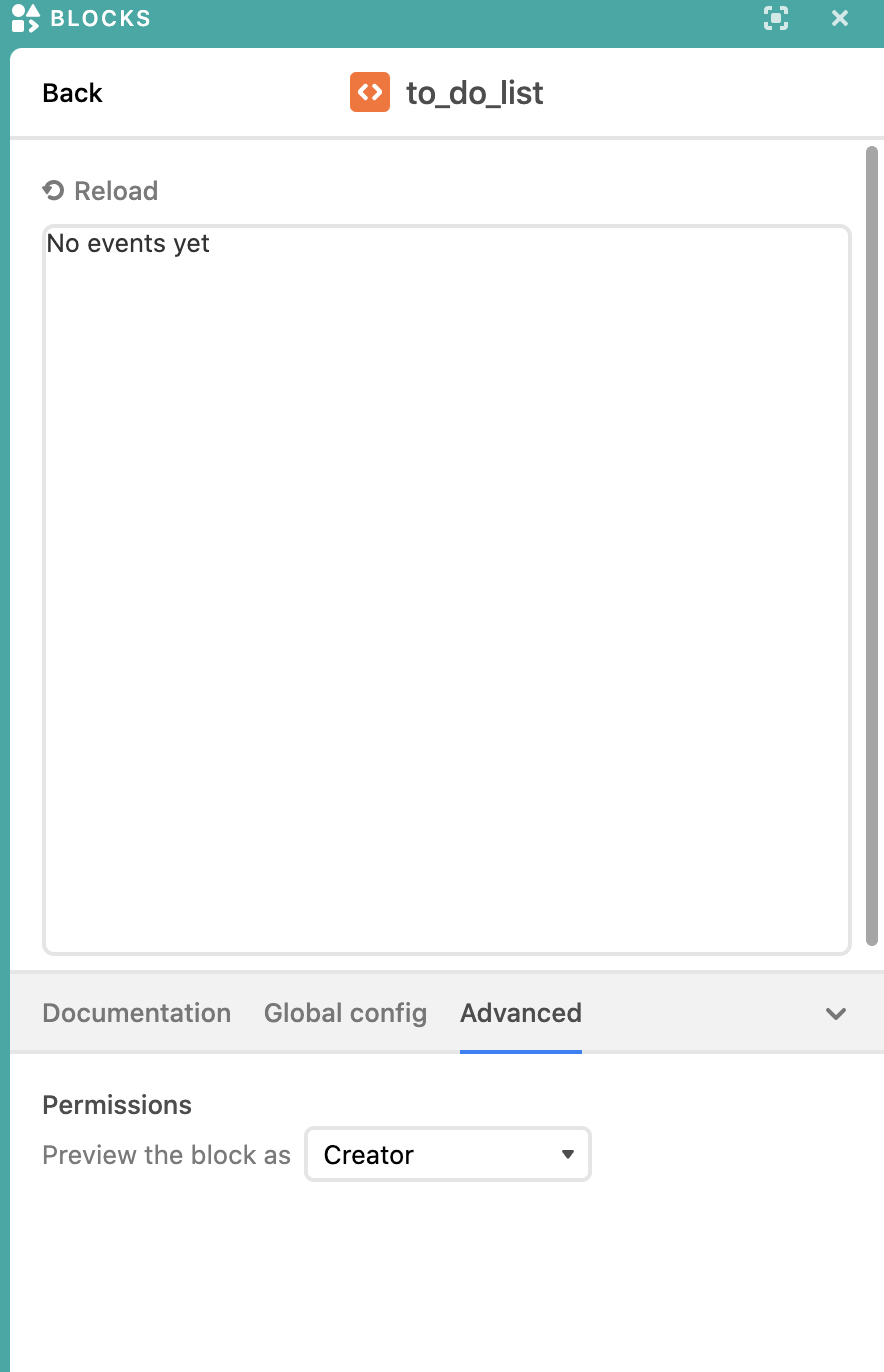
Testing your block
You can test your development block by sending “perform record action” events to your block in the “Advanced” tab of the block developer tools. (You can quickly get the tableId/viewId/recordId format from the URL of an expanded record.)
Using your block with a button field
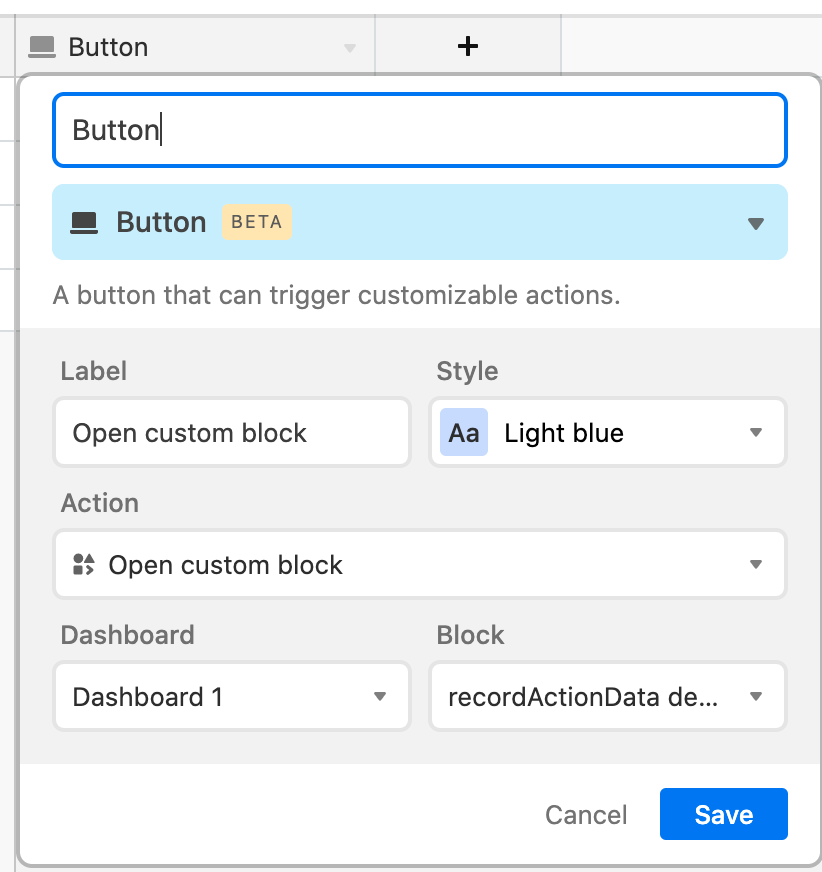
After your block is ready, run block release to update your block. Edit your button field to use the “Open custom block” action and select your block.
 .
.