
The end result of this guide is a Make.com scenario that’ll help you upload your email attachments into Airtable! You can duplicate this scenario into your Make account here: https://eu1.make.com/public/shared-scenario/VDkG4fHZz32/gmail-attachments-to-airtable-using-http
Couple things we’re going to need to prepare:
- A Personal Access Token (PAT) that has the scopes data.records:write for the base we want to upload to
- Create one here: https://airtable.com/create/tokens
- After creating it, copy it and keep it somewhere as we’re going to use it later!
- Guide to Personal Access Tokens: https://airtable.com/developers/web/guides/personal-access-tokens
- Create one here: https://airtable.com/create/tokens
- The Base ID
- You can get this by looking at the URL when you’re in your base
- e.g. for the following URL the Base ID is the bit that starts with ‘app’
- You can get this by looking at the URL when you’re in your base
- The Field ID of the attachment field
- You can get this by right clicking on your field header and clicking ‘Copy field URL’
- e.g. for the following Field URL, the Field ID is the bit that starts with ‘fld’
- You can get this by right clicking on your field header and clicking ‘Copy field URL’
Now that we’ve prepared these things we can get started with the Make scenario!
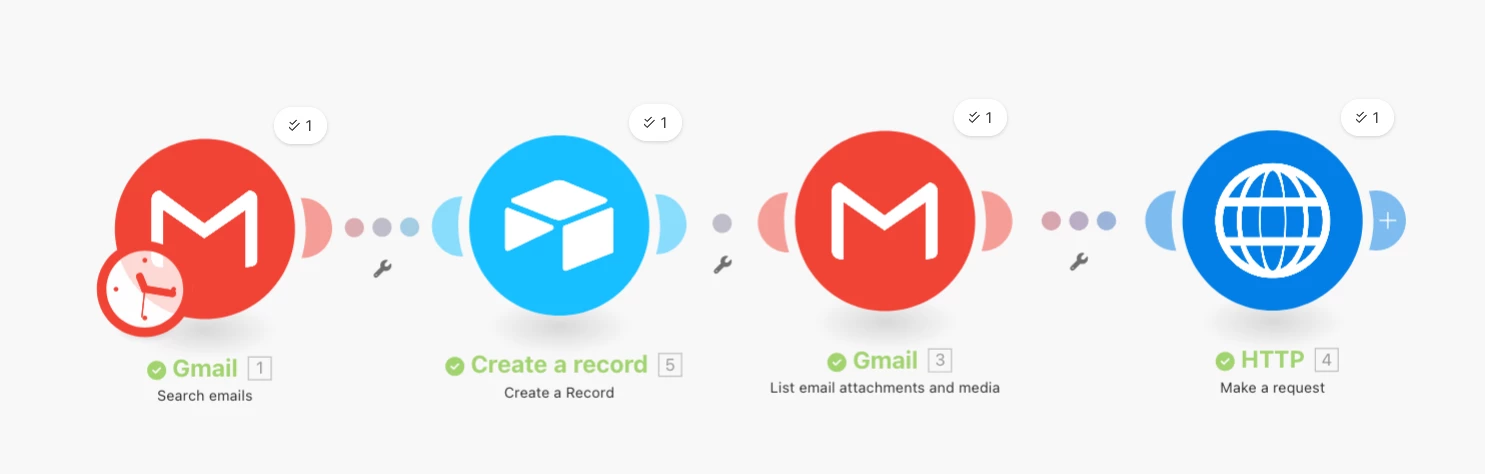
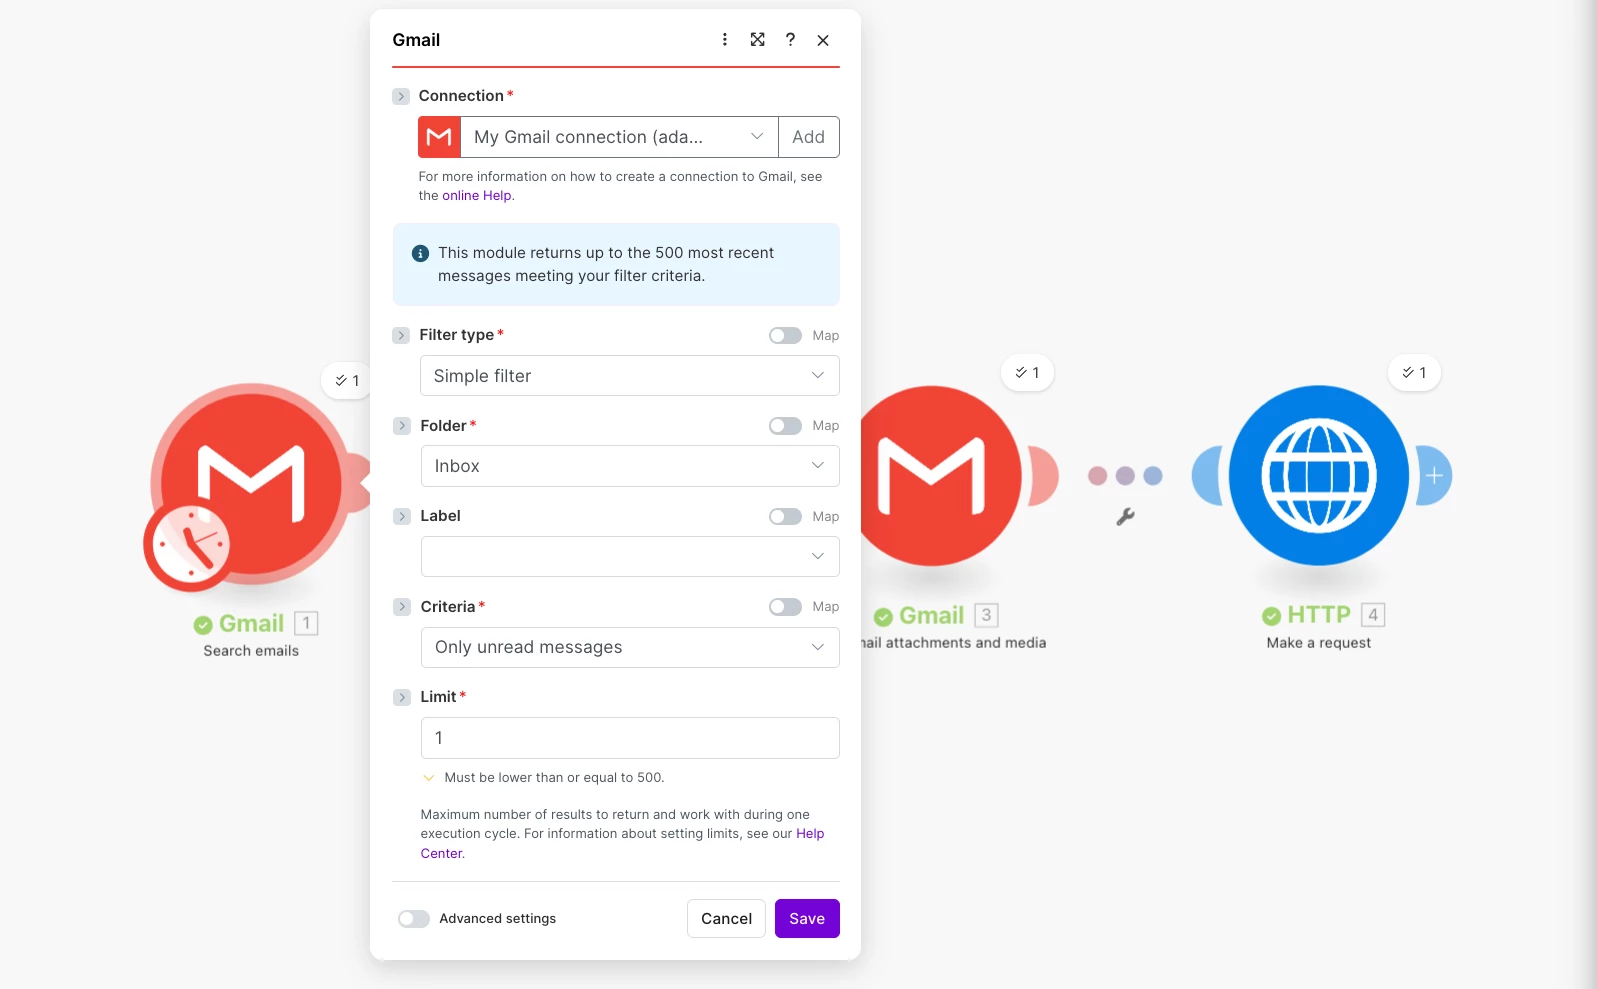
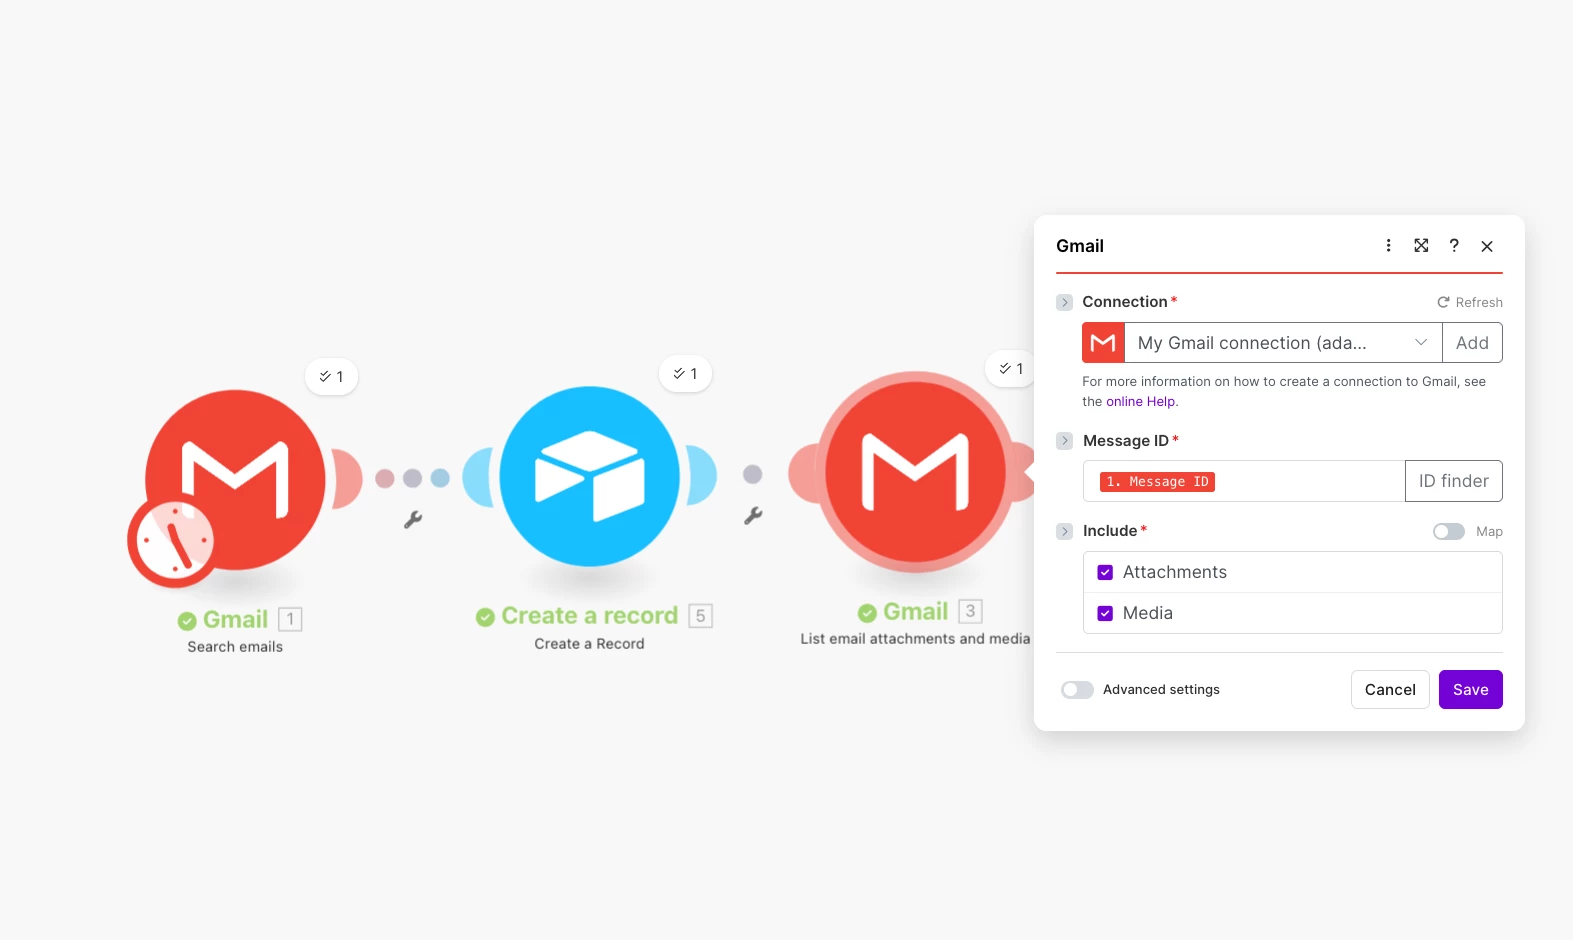
1. Search Email module
We’ll first create a ‘Search Email’ module to grab the example email we want. For testing purposes, send yourself an attachment with a PDF and we’ll use this email during setup. (When setting this up for production, you’ll probably use the ‘Watch email’ module instead!)
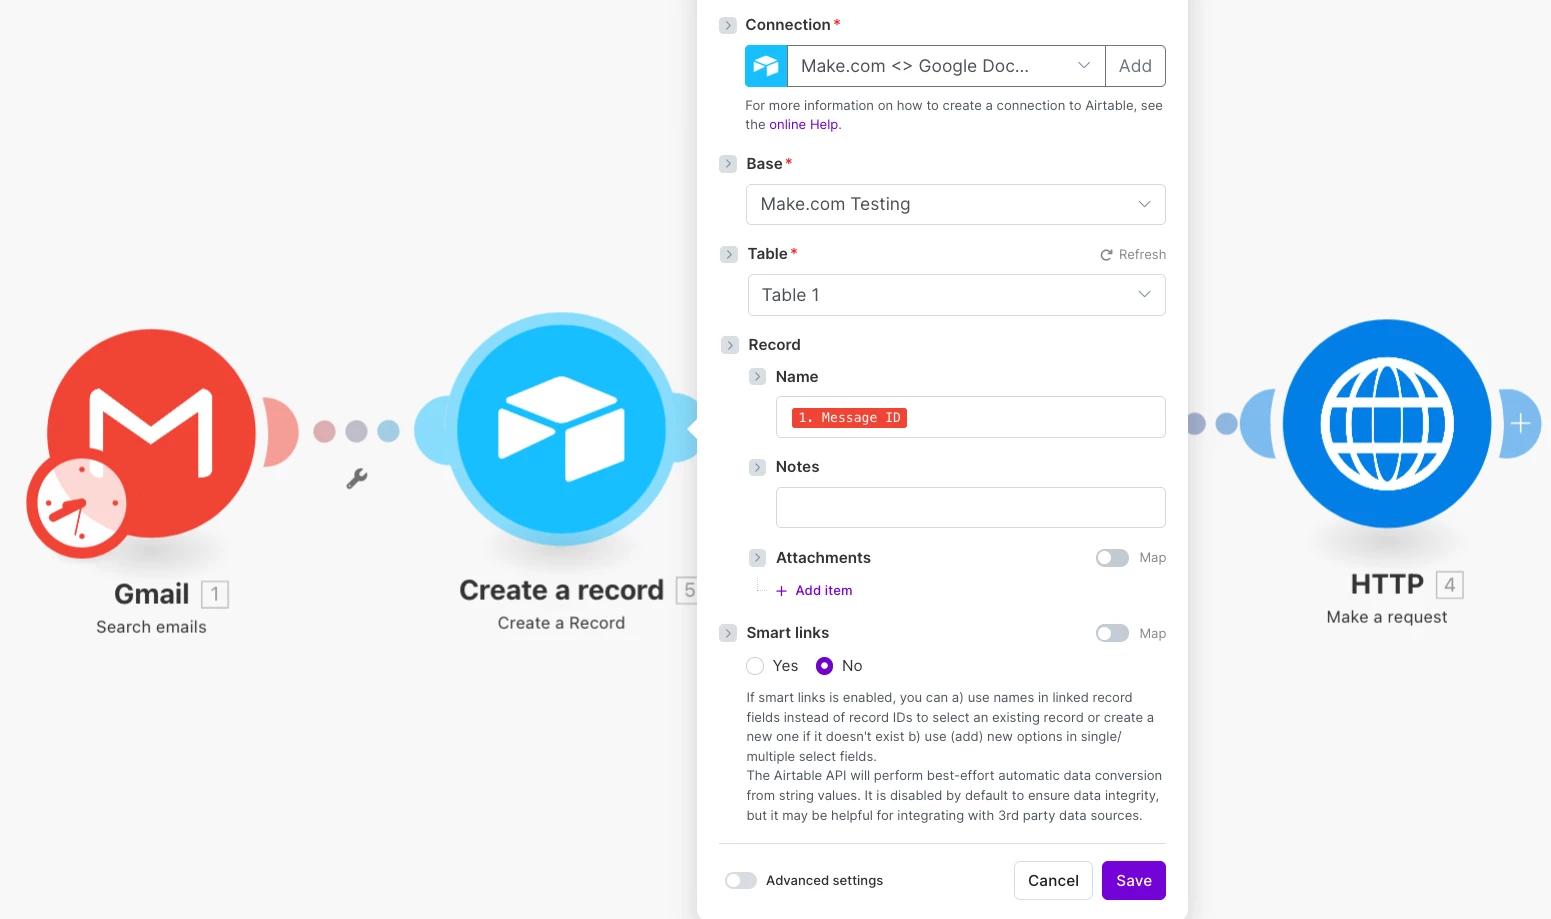
2. Create Record module
We’ll now add a ‘Create a record’ module for this email from step 1. In the screenshot below I’m just adding in the Message ID, but you can add in the title of the email, the body, sender, etc if you’d like
3. List Attachments module
We now add in a ‘List attachments’ module, and we give it the ‘Message ID’ of the ‘Search emails’ module’:
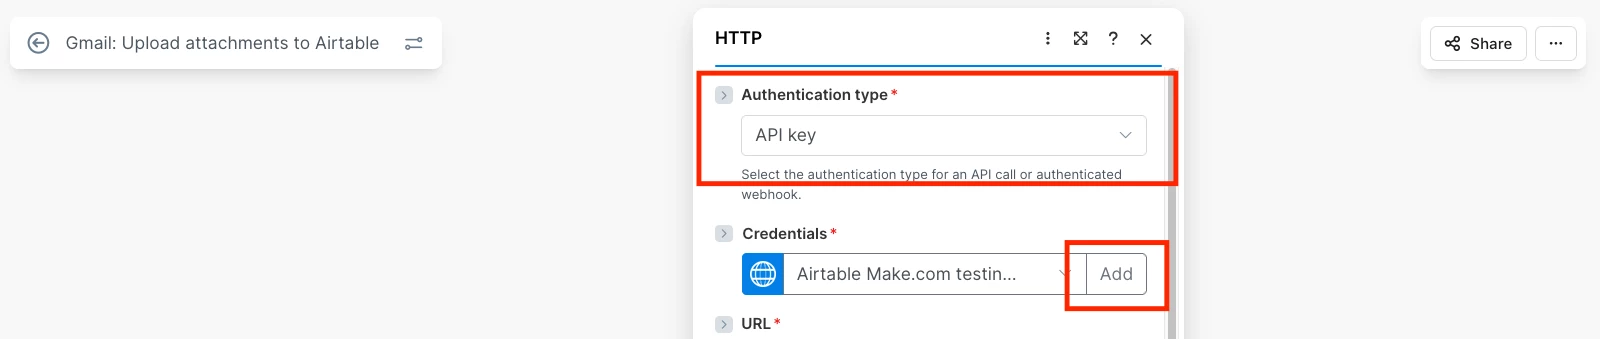
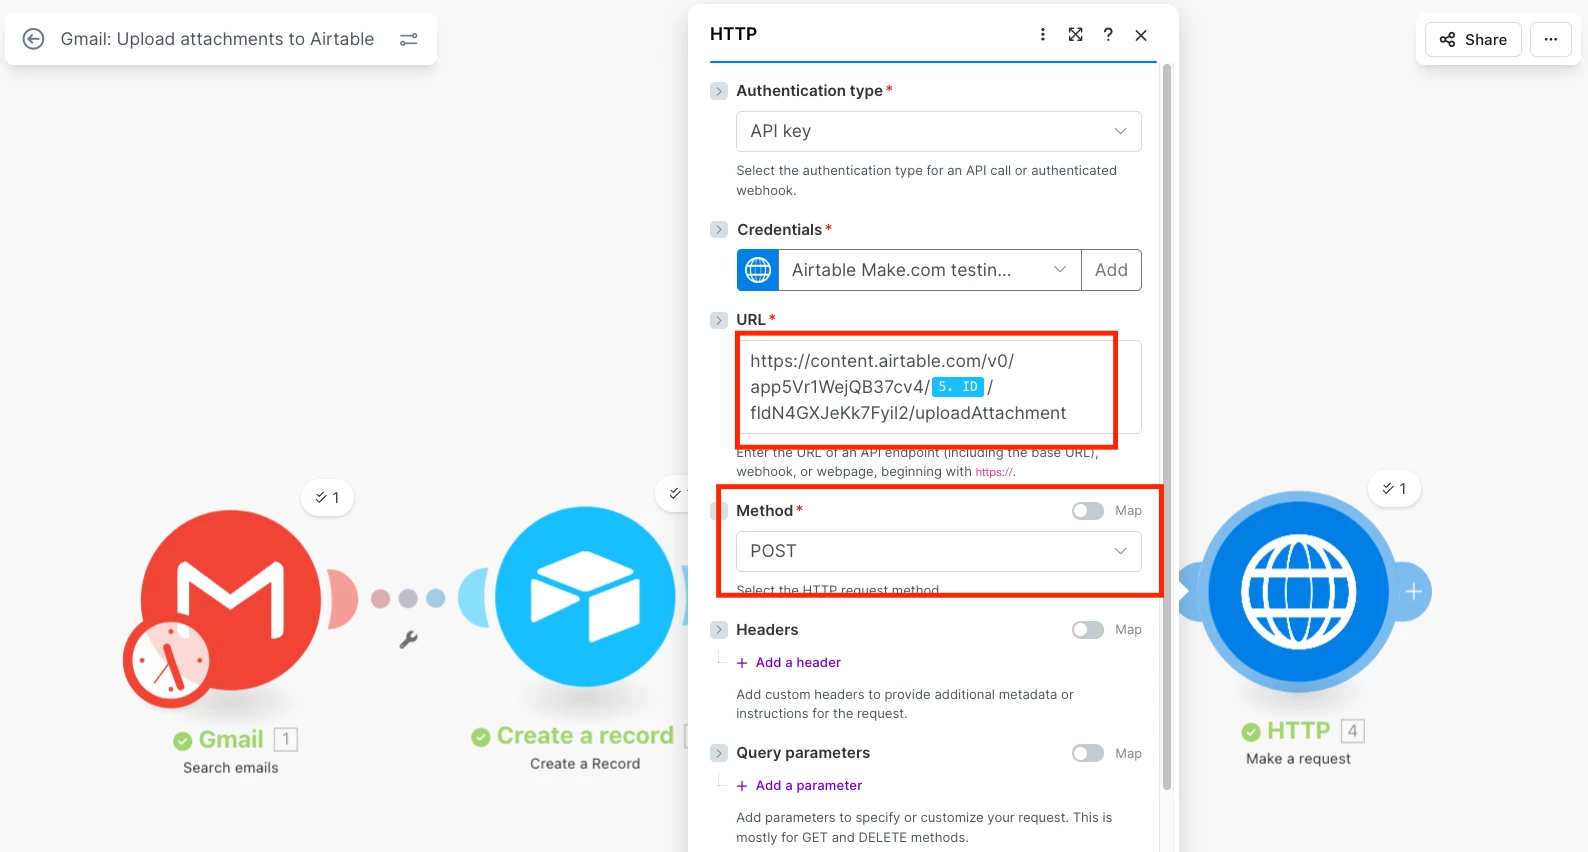
4. HTTP module
This is the tricky bit!
First, select the ‘Authentication type’ as ‘API key’ and then click the ‘Add’ button:
Then set your ‘Name’ and ‘Key’ value. The ‘Name’ value isn’t that important, just name it something you’ll remember
The ‘Key’ value will be a combination of the word ‘Bearer’ and the Personal Access Token we set up earlier, and it’d look something like this:
Bearer patj6SCNa6OSz4R2n.aecf3b11aba3171e89749a52992efd732214fb27e6854a712d73af19c43814dd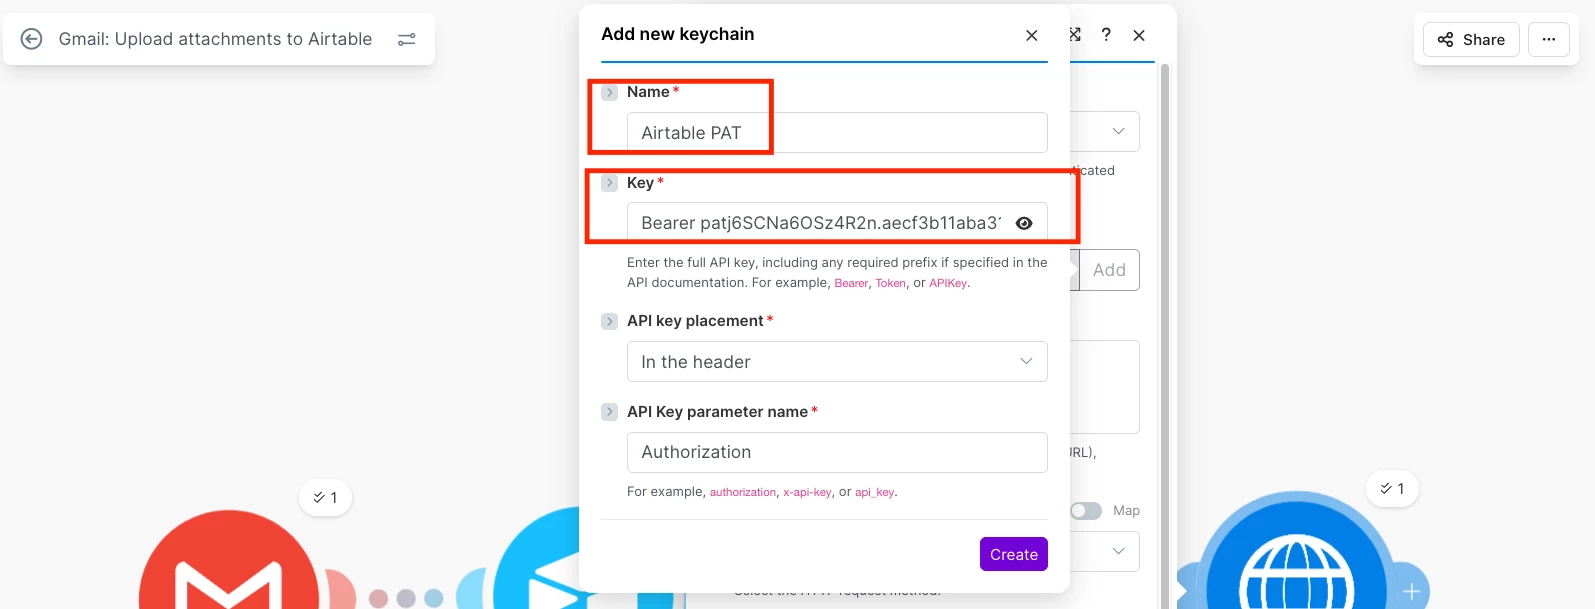
The Airtable API’s Upload Attachment endpoint documentation can be found here: https://airtable.com/developers/web/api/upload-attachment
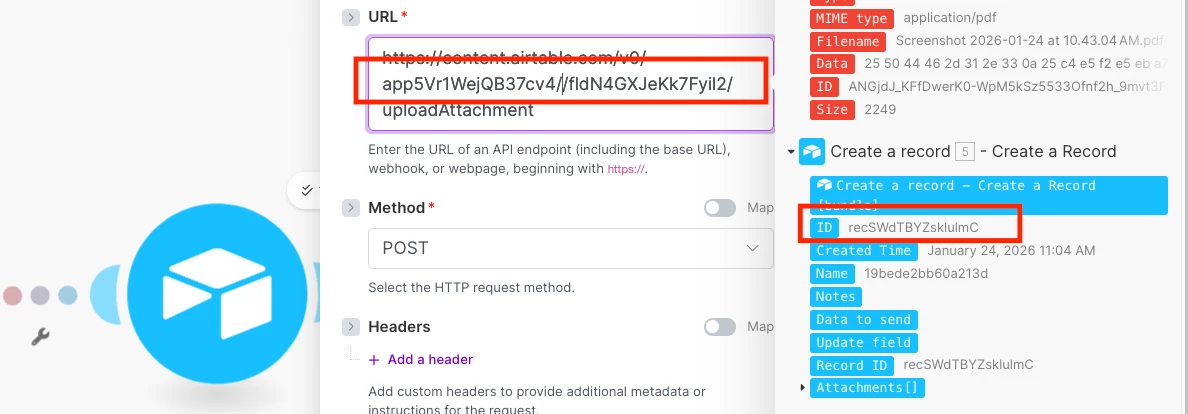
It expects the URL in the following format:
https://content.airtable.com/v0/{baseId}/{recordId}/{attachmentFieldIdOrName}/uploadAttachment
And so we just need to replace the ‘baseId’ and ‘attachmentFieldIdOrName’ bits with the data we prepared previously. We then replace the ‘recordId’ with the ID of the ‘Create a record’ step. In the screenshot below, I placed my cursor where I wanted to insert the record ID, and then selected it from the popup:
The end result can be found below. We then want to select the method ‘POST’
Home stretch!
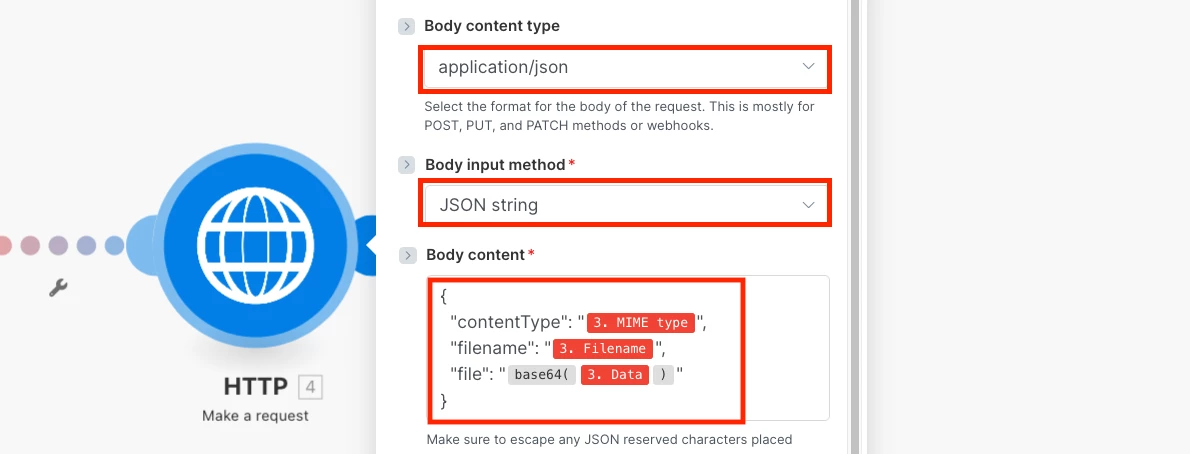
Set the Body Content Type to ‘application/json’, the ‘Body Input Method’ to ‘JSON string’.
For the ‘Body Content’, we’ll use the following. You should be able to copy the text below and paste it into your module
{
  "contentType": "{{3.mimeType}}",
  "filename": "{{3.filename}}",
  "file": "{{base64(3.data)}}"
}
The idea is that we’re putting in the filename we got from the ‘List attachments’ module, and for the ‘file’ we’re converting the file data into base64 (which Airtable requires) using Make’s ‘base64’ function
And that’s it! Let me know if you have any problems setting it up and I’ll see what I can do to help
---
🟢 I’m available for hire!