

Introducing Default Field Values via new Scripting Block
Brought to you by the team at BuiltOnAir & Openside/On2Air
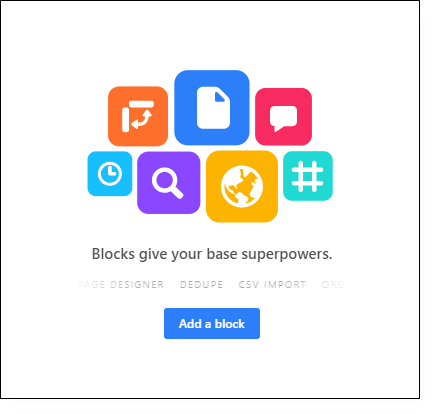
Overview
Airtable’s Scripting block brings a new level of customization to your Airtable bases. The Scripting block will allow you to run scripts to enhance your bases and manage tedious tasks. You can do things such as create templates for records, prompt users, create custom reports, and much more. Once the script is added to your base, you can use it with the click of a button.
We are creating a library of scripts for you to use in your Airtable bases. We have many more examples on the way. These scripts will give you an even better understanding of the data in your base and eliminate repetitive data entry.
About This Script: Setting Default Values
In this tutorial, we will show you how to set a default value for any record or field in your base.
With this script, every time you create a record in your base table, it will automatically add the data you set as a default. You will not have to manually enter the information. It will also add the data to records already created if you need to add or change previous records.
Setting a default value for a field will save hours of data entry and ensure data consistency, especially useful for records shared among multiple users. You can use this script for your entire table or you can choose a view to filter only specific records.
First, we will show you how to add the script to your Airtable base for the initial set up. This will only have to be done one time. We’ve created an easy template for you to start.
Second, we will show you how to use the script to configure and set your default values.
To use this script, you do not need to know any code or programming. You must have ‘Owner’ or ‘Creator’ permissions to set up the Script Block since you will be adding a table. You can then allow ‘Editor’ users to use the block.
Example Base & Script
Install from the Universe this Block
OR
How To Set Up the Scripting Block for Setting Defaults
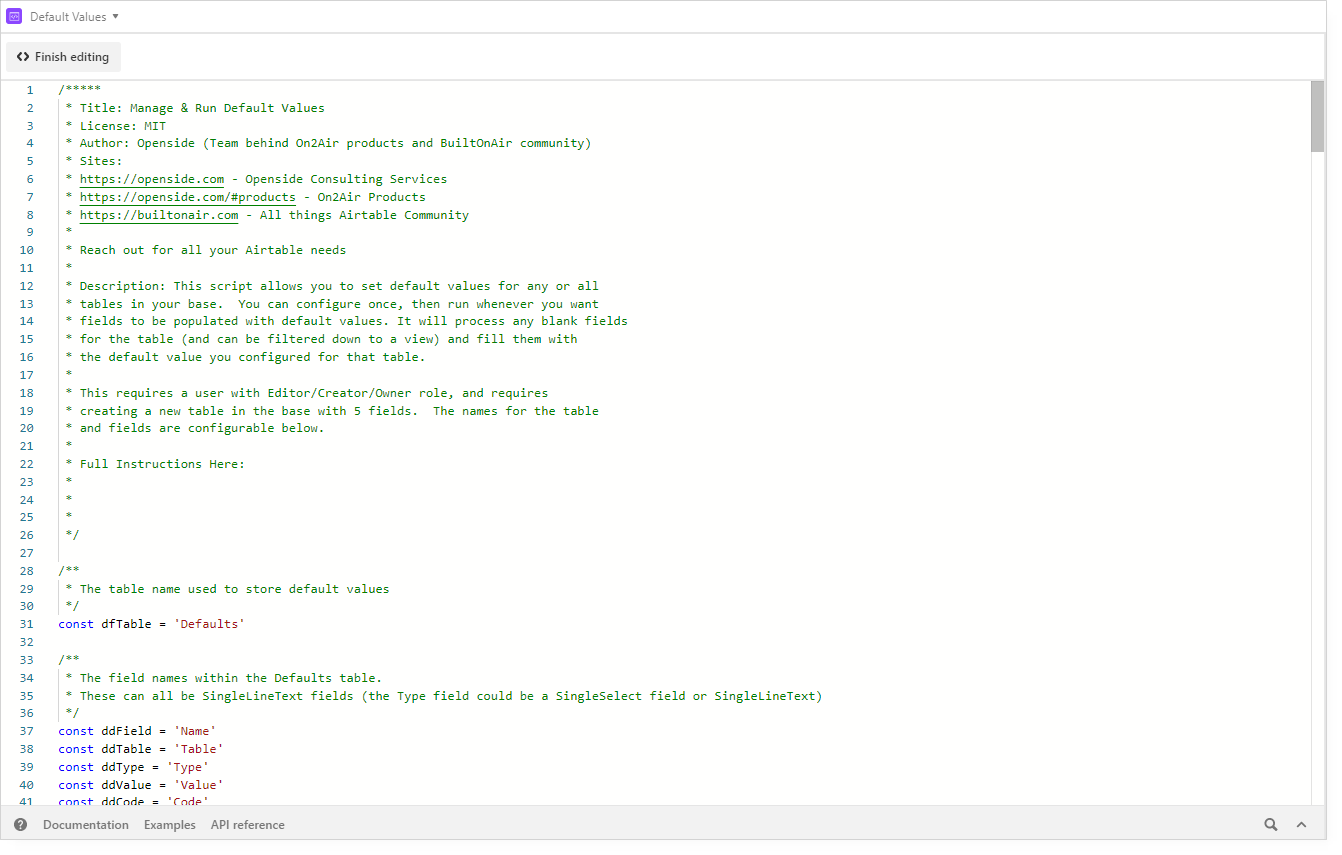
1. Create a new table in your base and call it Defaults
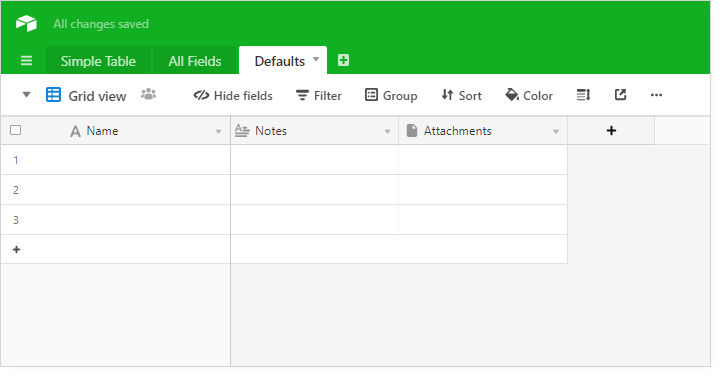
If you would like the table to have a different name, you will need to change the name in the script. We will show you how to do this later.
2. Copy all records from our example base and paste into your base in the Defaults Table you created
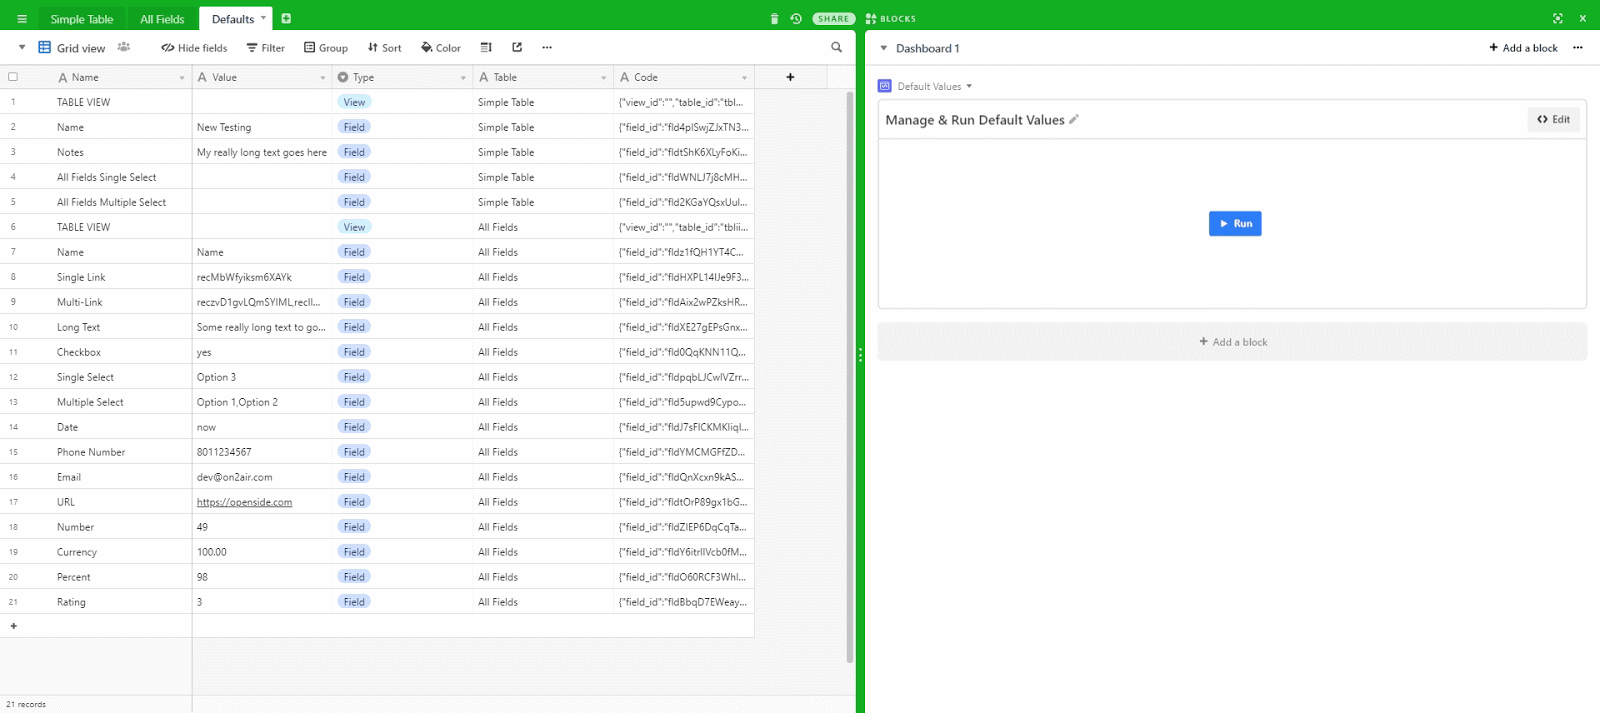
This table is connected to the script to store all your defaults.
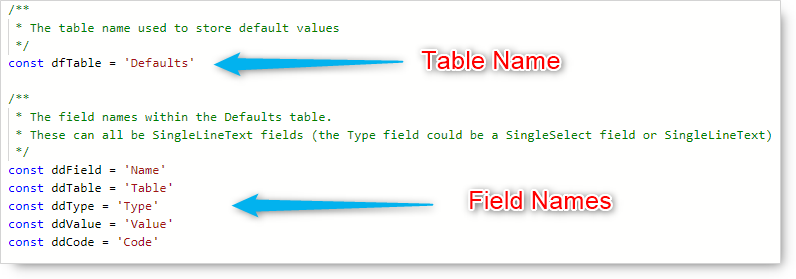
You now have fields with Name, Value, Type, Table, and Code. These correspond to fields in the first few lines of the script code we will add.
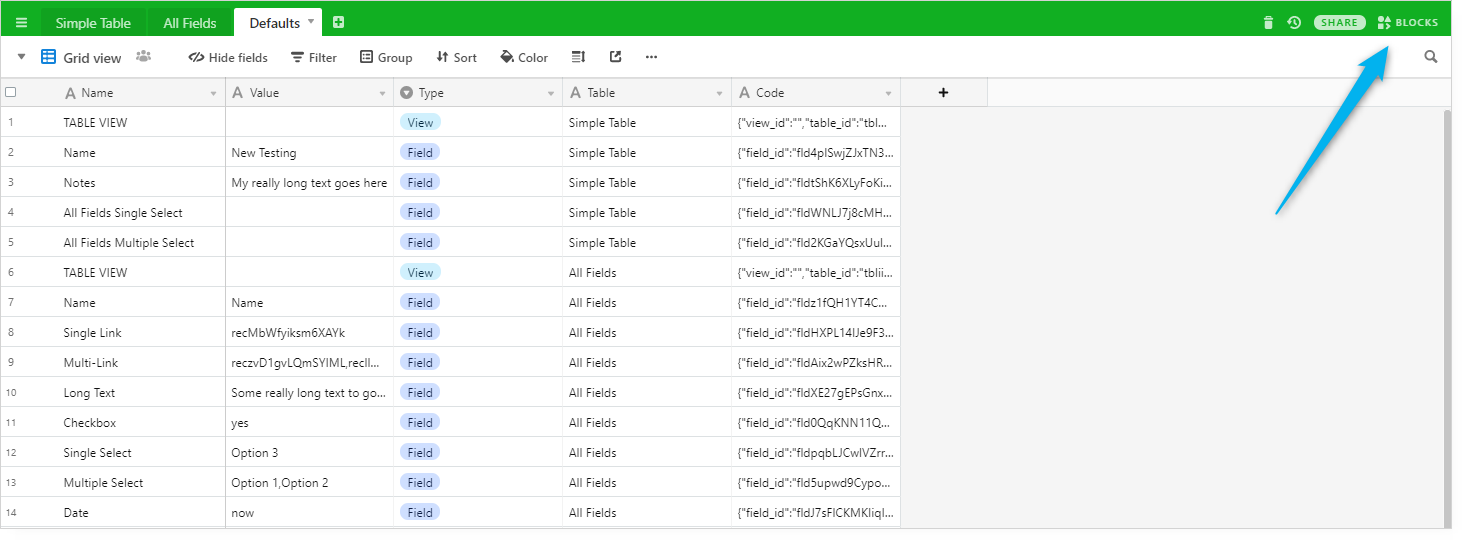
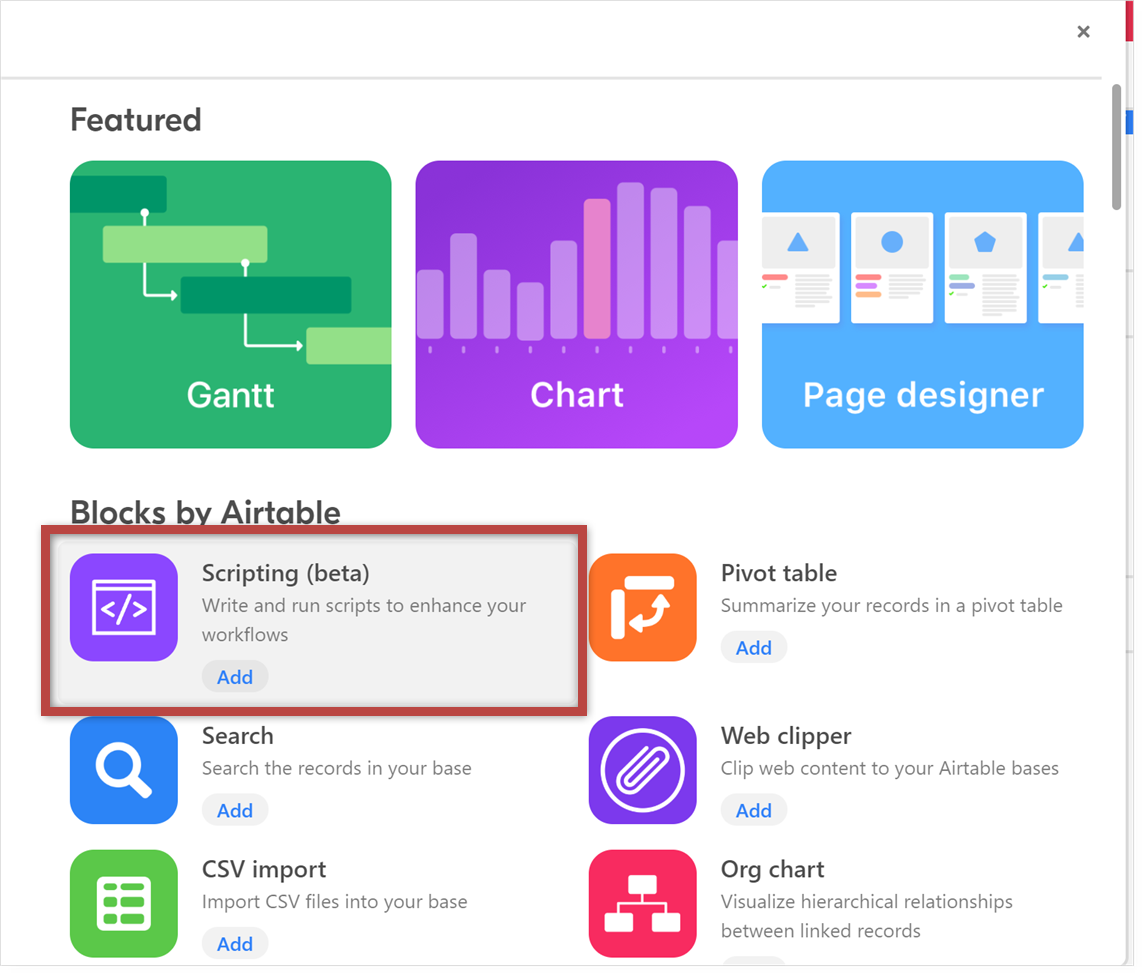
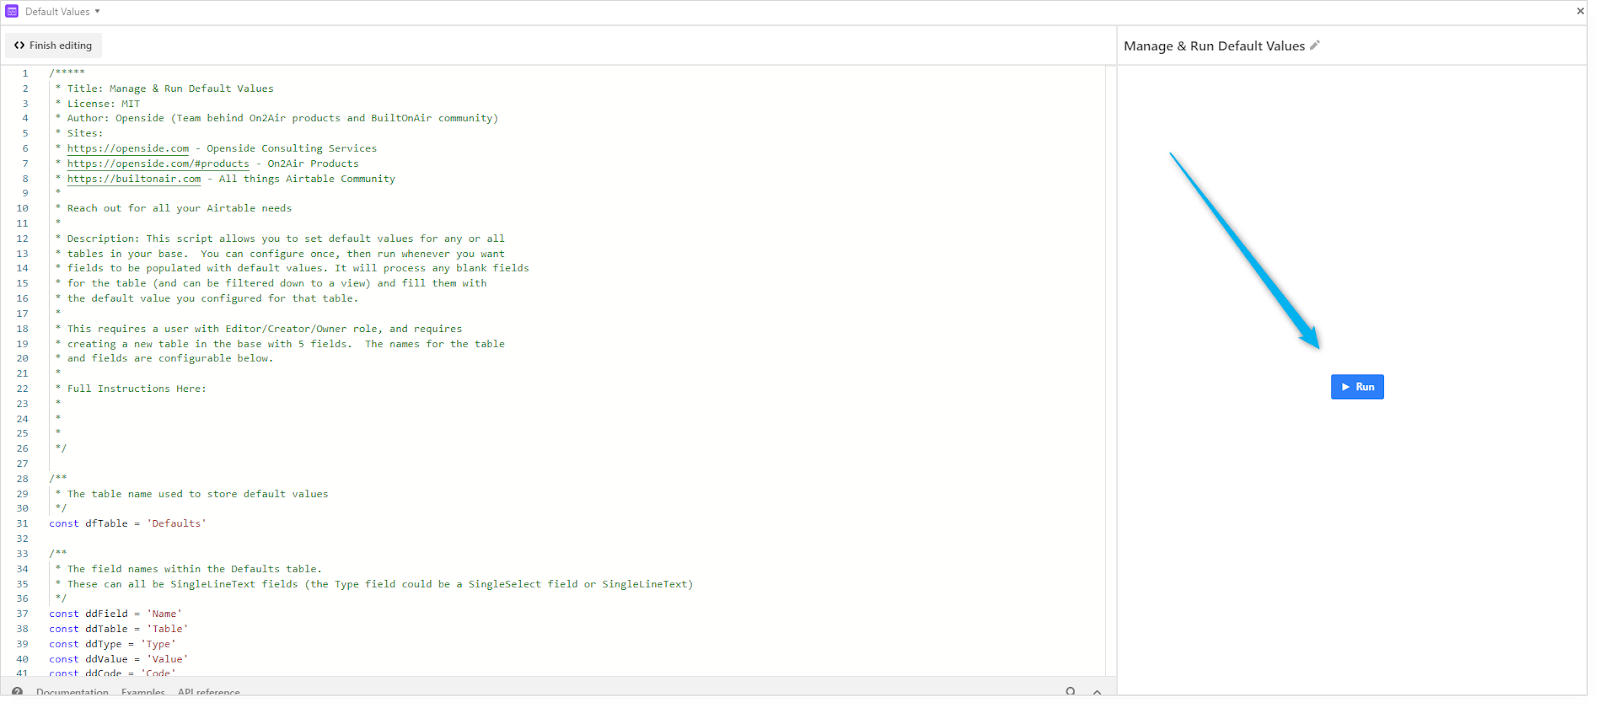
3. Click the Blocks button in the top right corner
4. Click Add a block and choose the Scripting block
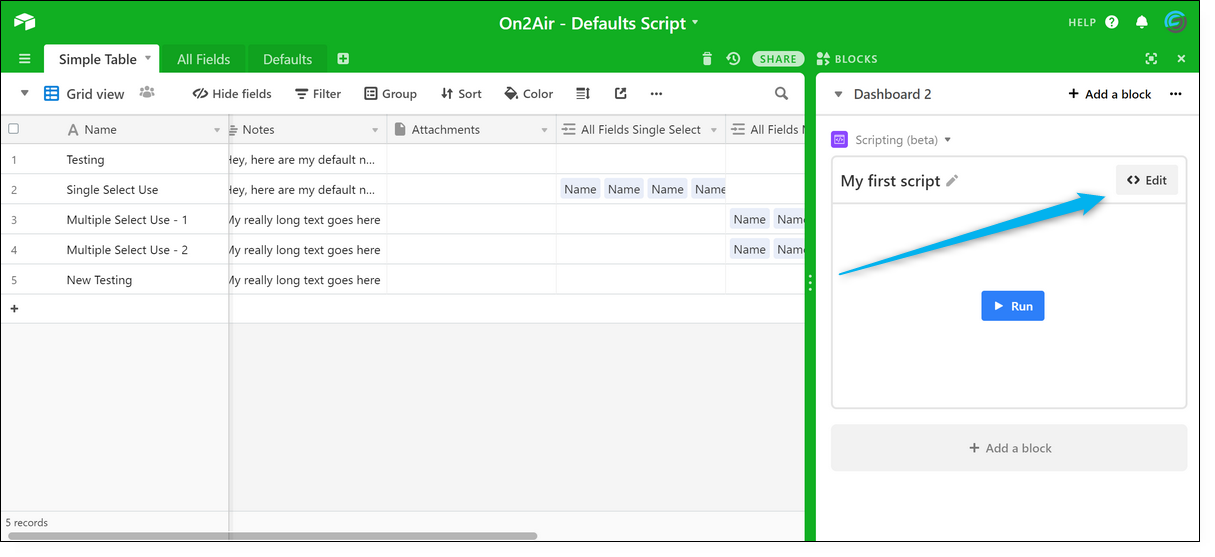
5. Click Edit in the top right corner of the block to open up the script editor
6. Copy the script from our example base and paste it into your script editor in the top left box
You now have the Script added to your base!
Or, you can also retrieve the code here.
Note: If you would like to change the Defaults table name or the field names, you will need to also change the names in the script.
How to Add Default Values
Now, we will show you how to set default values for your fields. This is what you will need to do each time you need to add, change, or delete the default values.
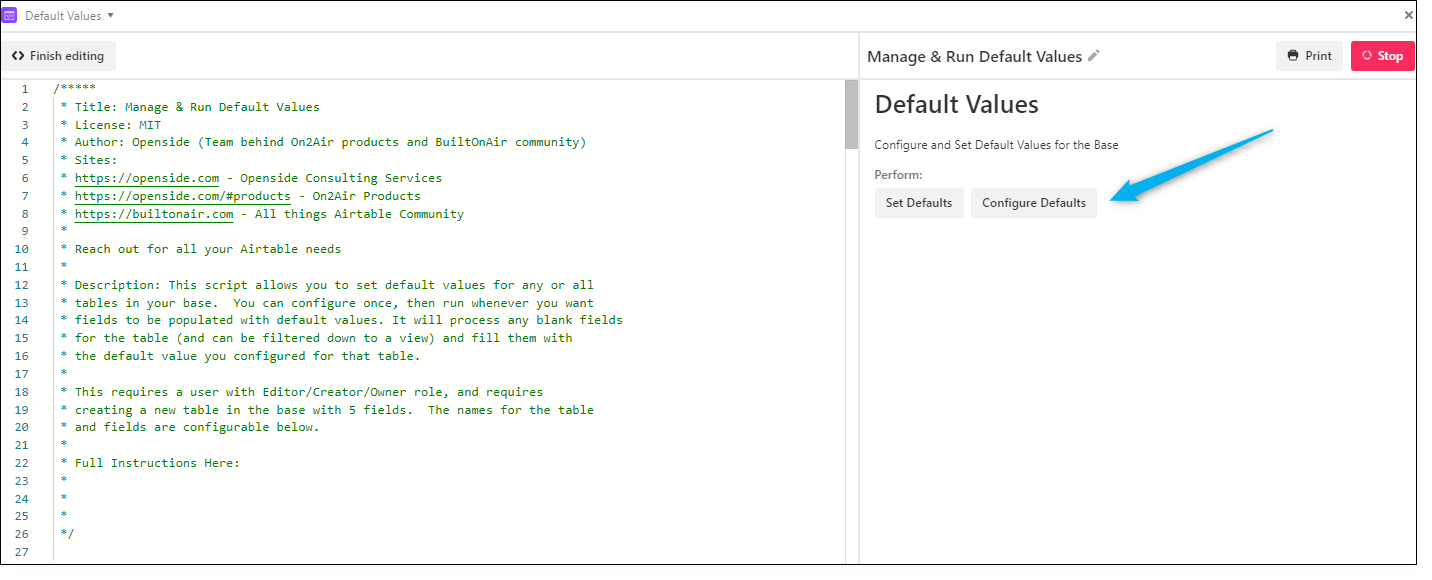
1. Click Run
2. Click Configure Defaults
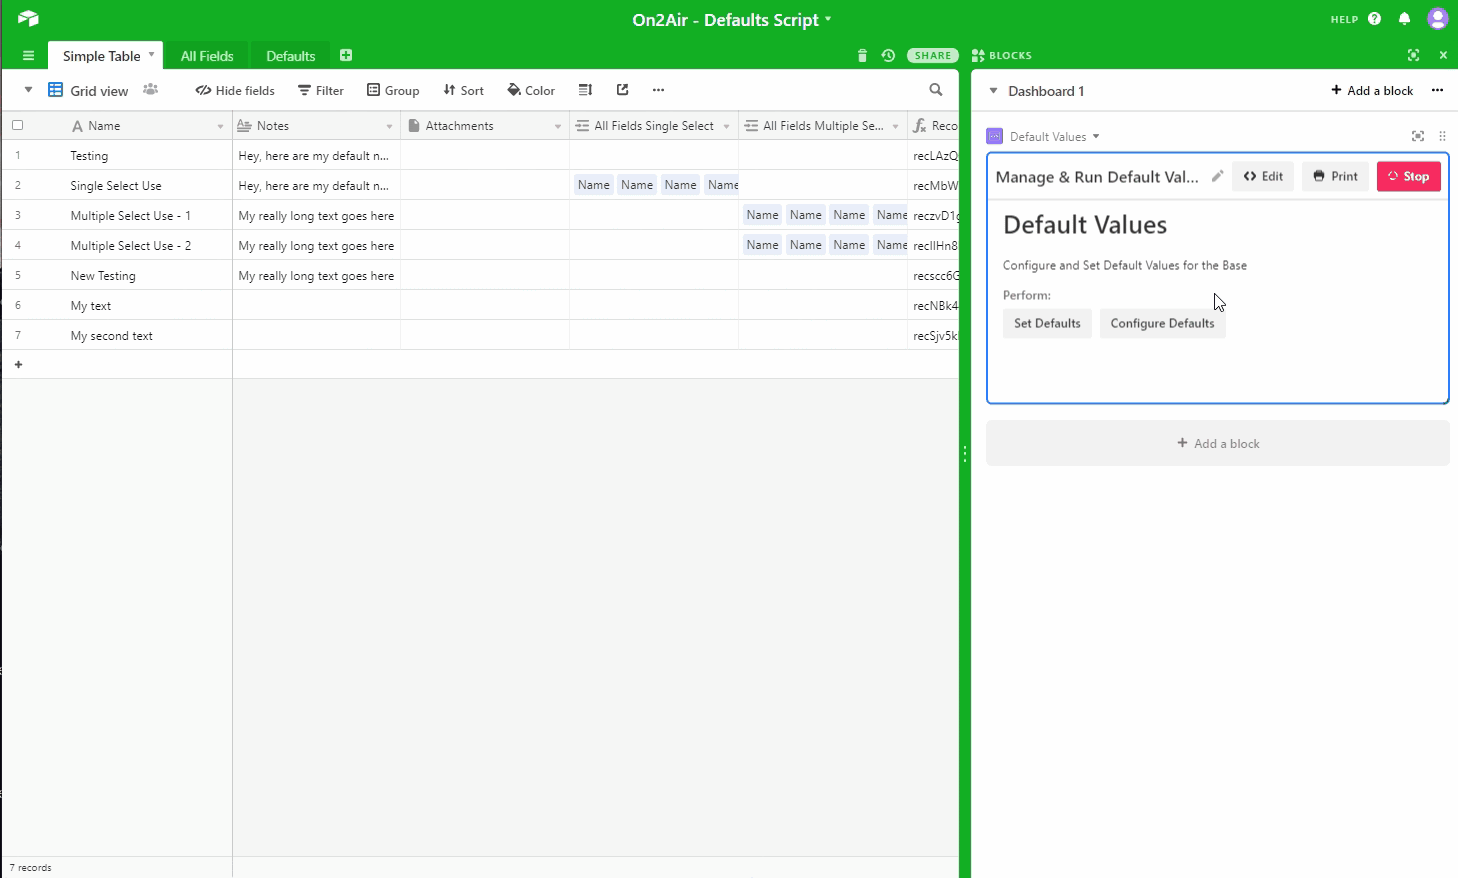
All the tables in your base will now display. The tables in my base are Simple Table and All Fields.
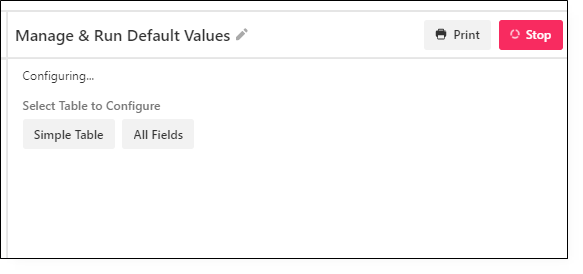
The Defaults table you created earlier will not show since you don’t need to create defaults for your Defaults table.
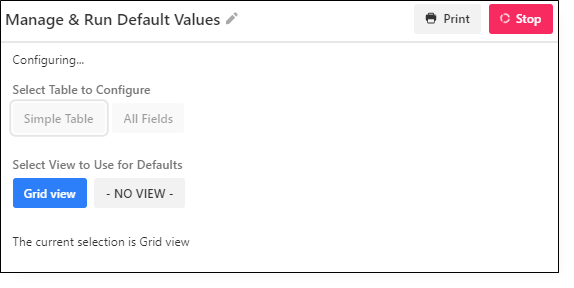
3. Select the table and view where you want the default values set
You will then be given the option to choose a specific view. If you want to set defaults for only a specific view, choose the corresponding view. If you want to set defaults for all records in the table, choose No View.
Choosing a specific view is useful for updating default values for only a certain set of records. You may not want to update all your table records with defaults so choosing a view will allow you to specify which records need defaults. We recommend choosing a specific view if your table has a large amount of data.
Once you’ve chosen a View, all the fields from the table will be displayed.
Note: Currently, the cursor drops down to the last field. Scroll up to the top to start with the first field.
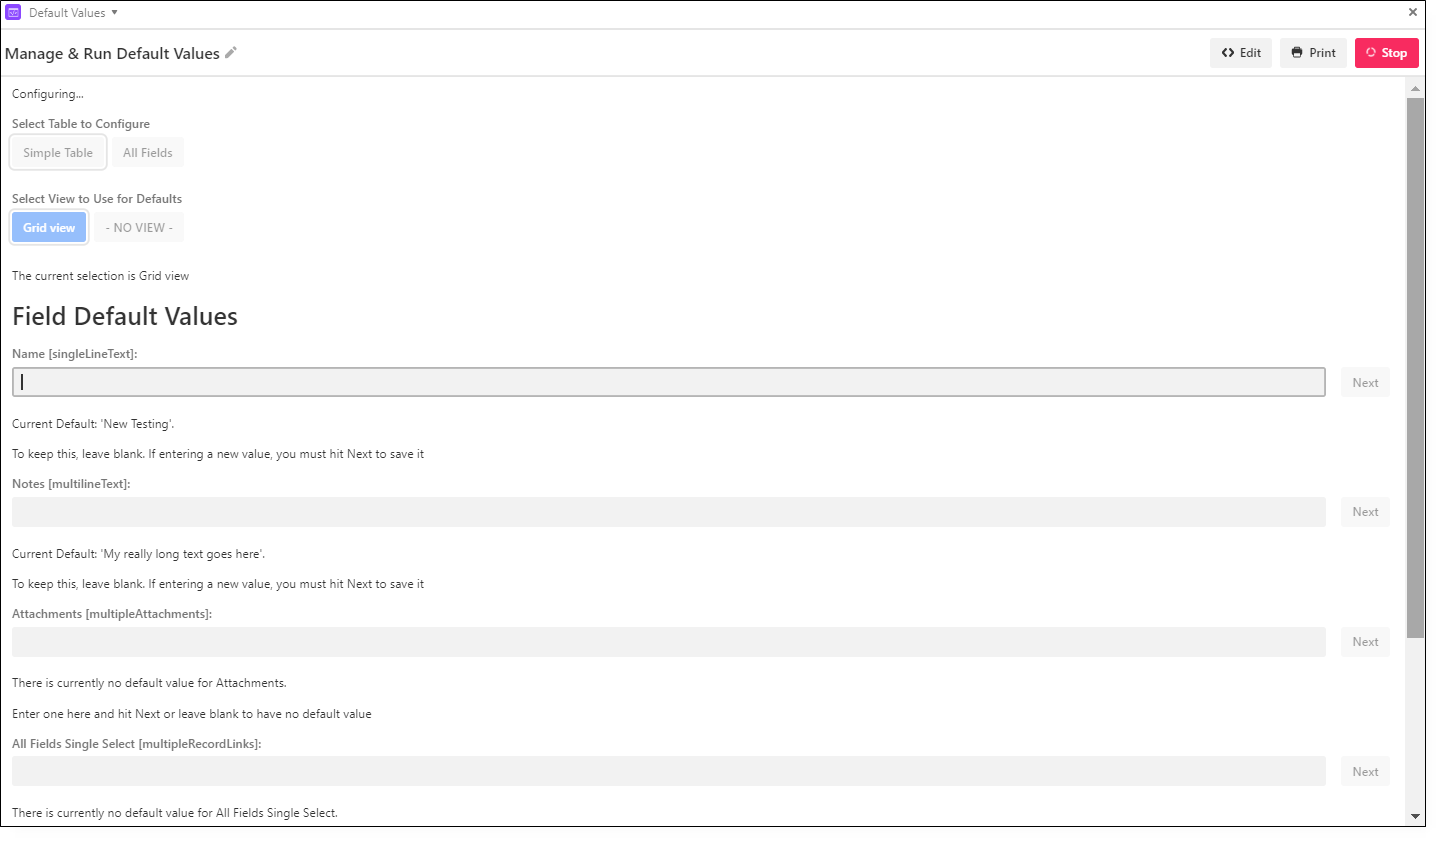
4. Set your defaults
Each line will tell you the Field Name and also the Field Type. You can also see the current default value if you have already configured one.
To add a default:
Type your default value in the box and press Next. You can also hit Enter to save the current line.

If you do not want a default value:
Leave the box blank.
If you need to clear out a previously configured default value:
Press the spacebar and click Next.
Once you add all your default values, click Done.
5. Click Set Defaults then choose the table where you added Defaults
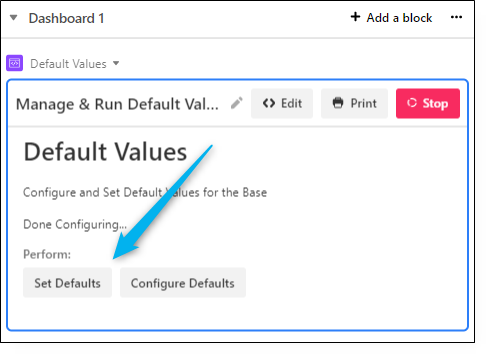
It will now add your default values to the fields you set.
In this example, I set a default for the Notes field. The block will also tell you how many were updated.
Defaults By Field Type
To ensure each field displays your default data, review each of these field types to input your data with correct formatting. We have covered a majority of the fields. However, not every field type can have a default value set.
| FIELD TYPE | FORMATTING | EXAMPLE |
|---|---|---|
| Single line text | Text Data |  |
| Long Text | Text Data | 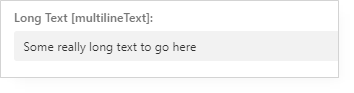 |
| Collaborator | Add the Collaborator’s email address | 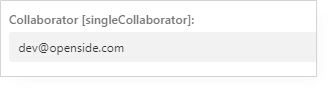 |
| Attachment | This must be a URL to a publicly accessible file or image |  |
| Link to Table | In order to set defaults for linked records to other tables, you will need the Record ID from the record in the table where you want to link. To obtain the Record ID: Add a Formula field in the table you want to link. Type in RECORD_ID() then click Save. You will now have a Record ID for each record in the table. |
Formula: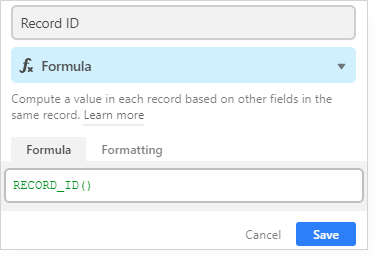 Record ID: Record ID: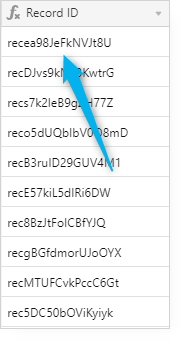
|
| Single Link Record ID | Copy and paste the Record ID into the default value field |  |
| Multiple Linked Records Record IDs | Copy and paste the Record IDs into the default value field and add a comma between records | 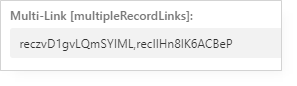 |
| Single Select | Copy and paste the data from your Single Select field. These must be configured in your base prior to setting a default. You cannot add new single select options through the default value script. | 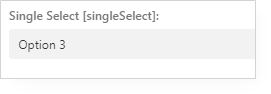 |
| Multiple Select | Copy and paste the data from your Multiple Select field. You can add more than one default from your Multiple Select field by adding a comma between multiple select options. These must be configured in your base prior to setting a default. You cannot add new multiple select options through the default value script. | 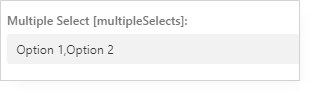 |
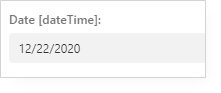
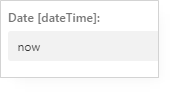
| Date | Format the date as MM/DD/YYYY. You can also add a Current timestamp by adding the word ‘now’ without the quotes. |
|
| Phone Number | Standard numerals | 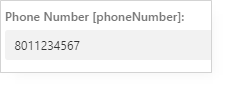 |
| Standard email format | 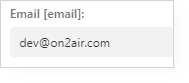 |
|
| URL | Standard URL format | 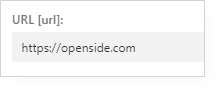 |
| Number | Standard numerals | 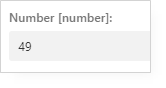 |
| Currency | Standard numerals Ex: 89 = $89.00 or your set currency |
 |
| Percent | Standard numerals in hundredths value EX: Type .98 to get 98% or .10 = 10% |
 |
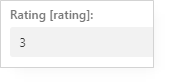
| Rating | A numeral from 1 to 5 Ex: 3 = :star: :star: :star: |
 |
| Rich Text | Currently Not Supported By Scripts Block… | Coming Soon… |
You can now set defaults for fields in your base. All you need to do is click Configure Defaults when you need to change or update them.
If you have any trouble, join our Slack community and we will do our best to help you.
We are adding more scripts all the time so join our community to get the latest.
Stay Updated

BuiltOnAir is the ultimate resource for all things Airtable.

